Select a Map
This map has both local and newer default changes.
Now Loading…
 Click to enlarge
Tactical Summary
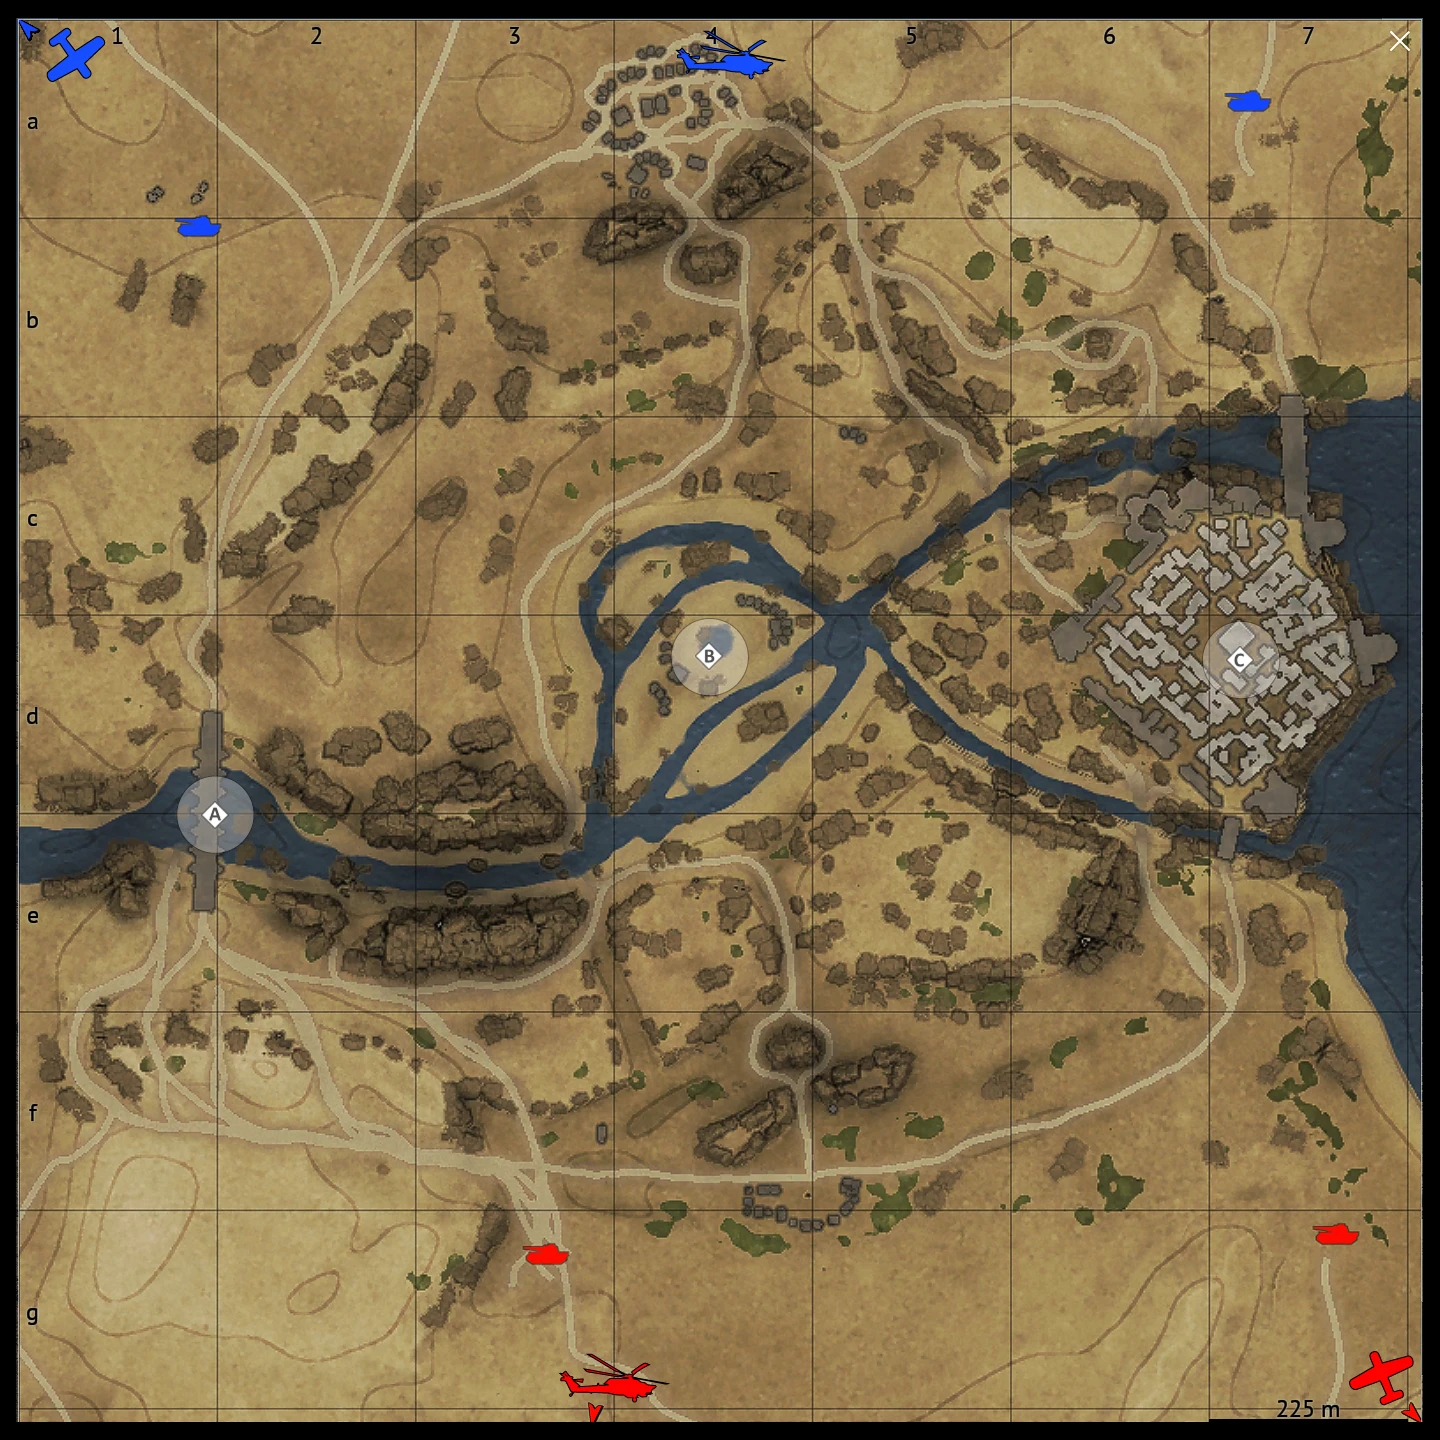
Tunisia Domination #1 consists of point A, where teams face each other hull-down across a bridge; the central B sector, which serves as a high-risk flanking route; and point C, where a fortress encloses a dense urban district.
A rapid breakthrough is possible through the urban area around C, while B provides opportunities for flanking maneuvers. Breaking the stalemate at A is more difficult and requires using one of several routes that cross the river beneath the bridge.
Fast vehicles can descend into these river approaches before the enemy is prepared. Slower vehicles should use smoke to conceal their movement while entering and crossing the exposed low ground.
Map editing tools
Drag icons from the legend onto the map.
Comment
0 / 120 B
0 / 120 B