Select a Map
 Click to enlarge
Tactical Summary
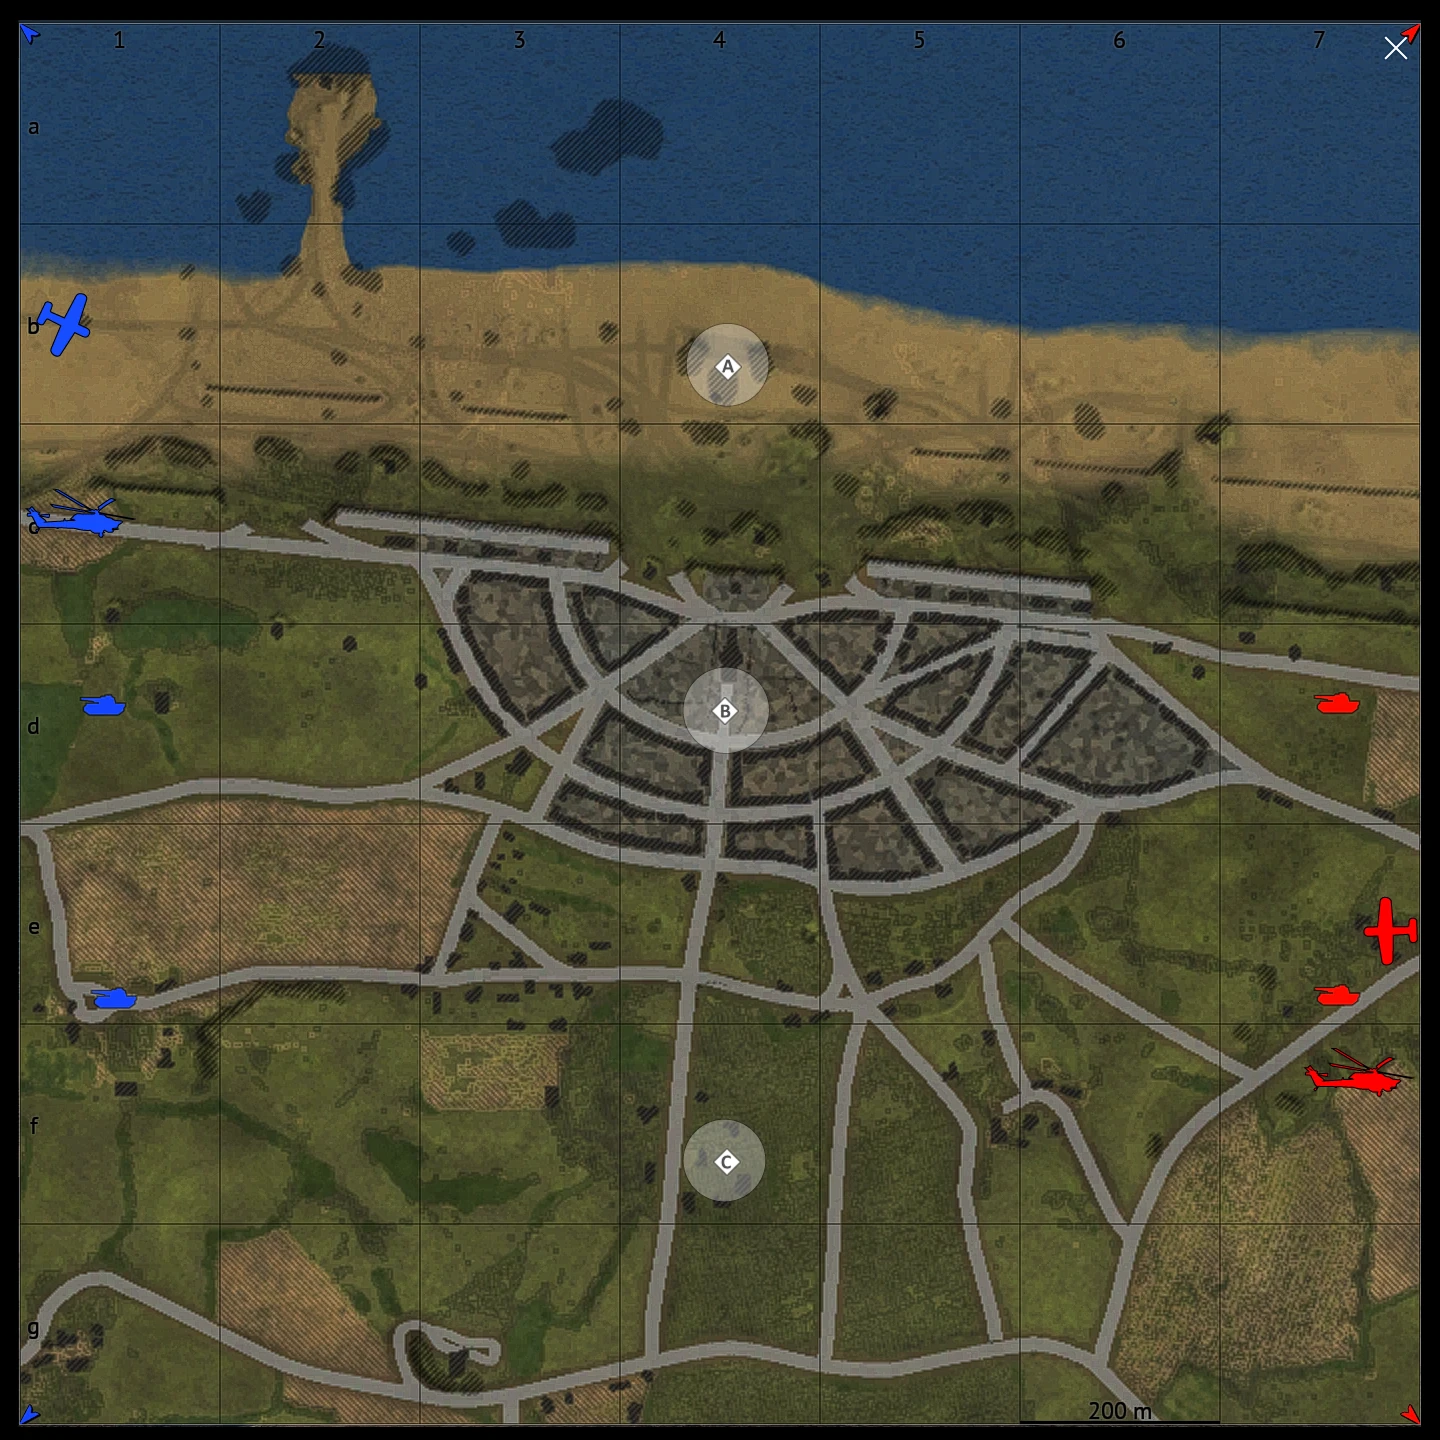
On Normandy, the main boulevard running north to south through the B capture point serves as the decisive axis of engagement. Whichever team gains control of this route is likely to seize the initiative.
Occupying the bell tower north of the church at B provides commanding control over much of the urban district, while securing the hill between B and C can effectively deny enemy forces access to the town.
The A capture point lies on the low-lying beach, where the tactical disadvantages of attempting a capture are excessively severe. The C capture point is situated within a basin, frequently resulting in a prolonged standoff as both sides adopt hull-down positions and exchange long-range fire.
The eastern team, however, can advance across the plains south of C and attempt a wide flanking maneuver—albeit one that carries considerable risk.
Map editing tools
Drag icons from the legend onto the map.
Comment
0 / 120 B
0 / 120 B