Select a Map
This map has both local and newer default changes.
Now Loading…
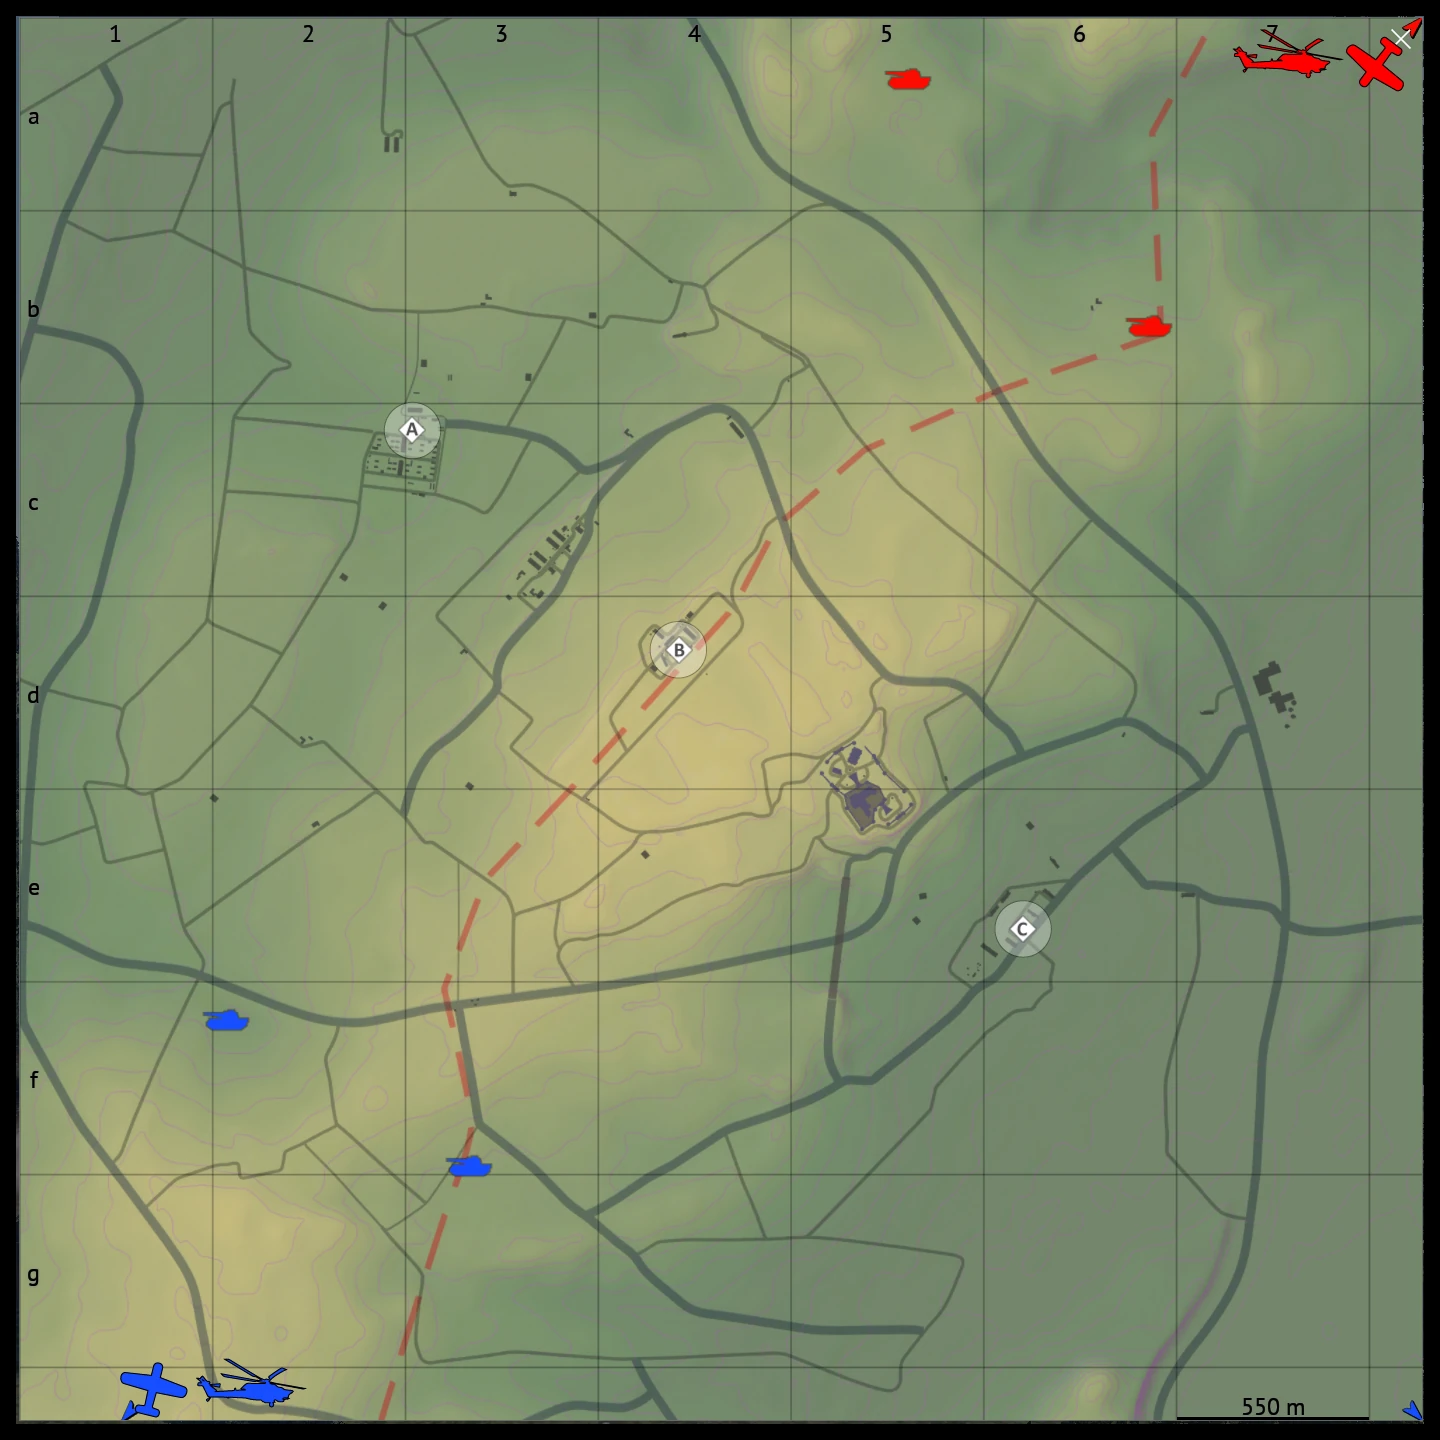 Click to enlarge
Tactical Summary
The central high ground is the decisive sector of Fulda Domination #1. The team that wins the battle for the center can immediately pressure the enemy spawn and establish control over virtually the entire battlefield.
Defending point C requires control of the castle between B and C, while defending point A depends on securing the village between A and B. These positions serve as the principal defensive anchors for their respective flanks.
Apart from sections of the castle and village, the map offers very little effective cover. Early in the match, vehicles can attempt a high-risk flank through the low ground toward either A or C, but the exposed approach makes this a considerable gamble.
Map editing tools
Drag icons from the legend onto the map.
Comment
0 / 120 B
0 / 120 B