Select a Map
This map has both local and newer default changes.
Now Loading…
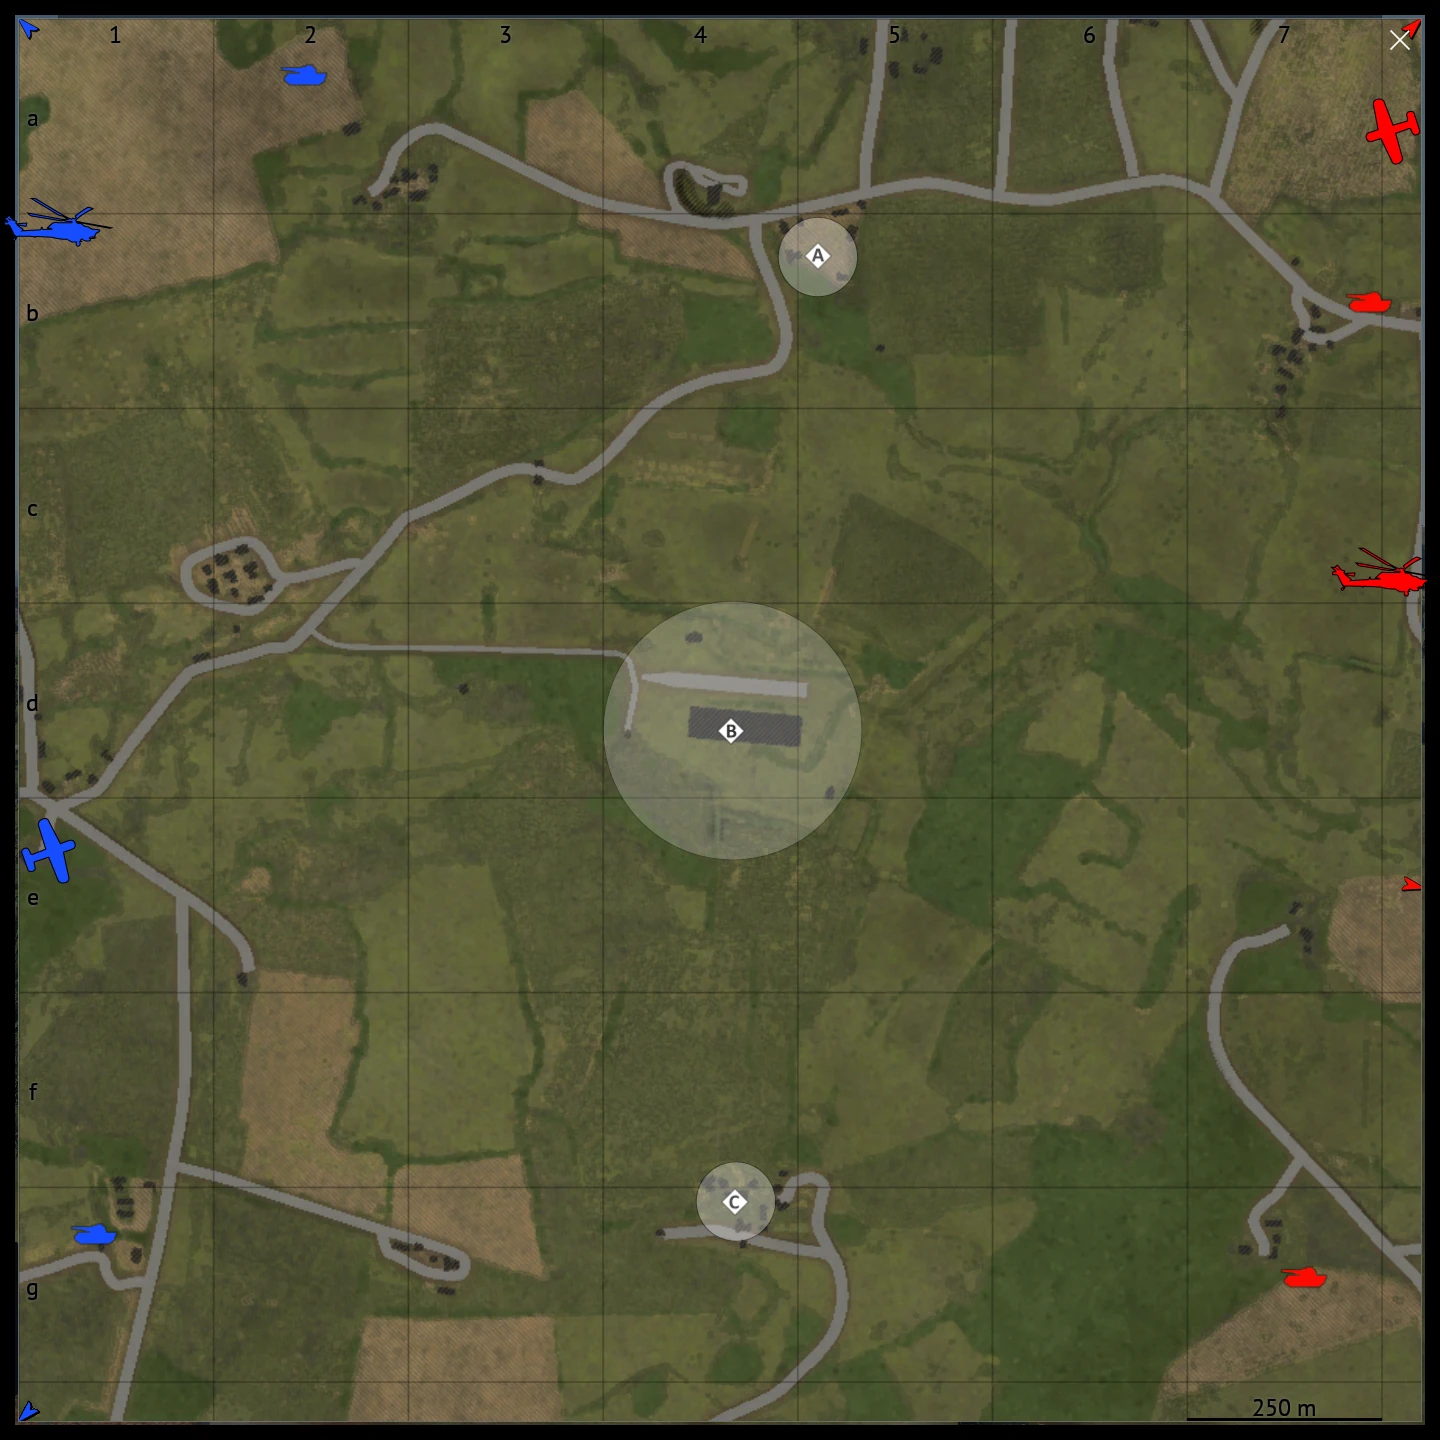 Click to enlarge
Tactical Summary
On Fields of Normandy, point B is the most strategically important area. Most of the flanking routes around the main fronts converge near B, and a successful maneuver through this sector can place direct pressure on both enemy spawn areas.
Around point A, rolling terrain encourages both teams to exploit ridgelines in hull-down engagements, often producing prolonged stalemates.
By contrast, point C lies on almost entirely open ground, offering little cover and making a direct breakthrough exceptionally difficult.
With the fronts at A and C often deadlocked, the match is usually decided by whichever team first completes a flank around B and uses it to collapse the opposing line.
Map editing tools
Drag icons from the legend onto the map.
Comment
0 / 120 B
0 / 120 B