Select a Map
This map has both local and newer default changes.
Now Loading…
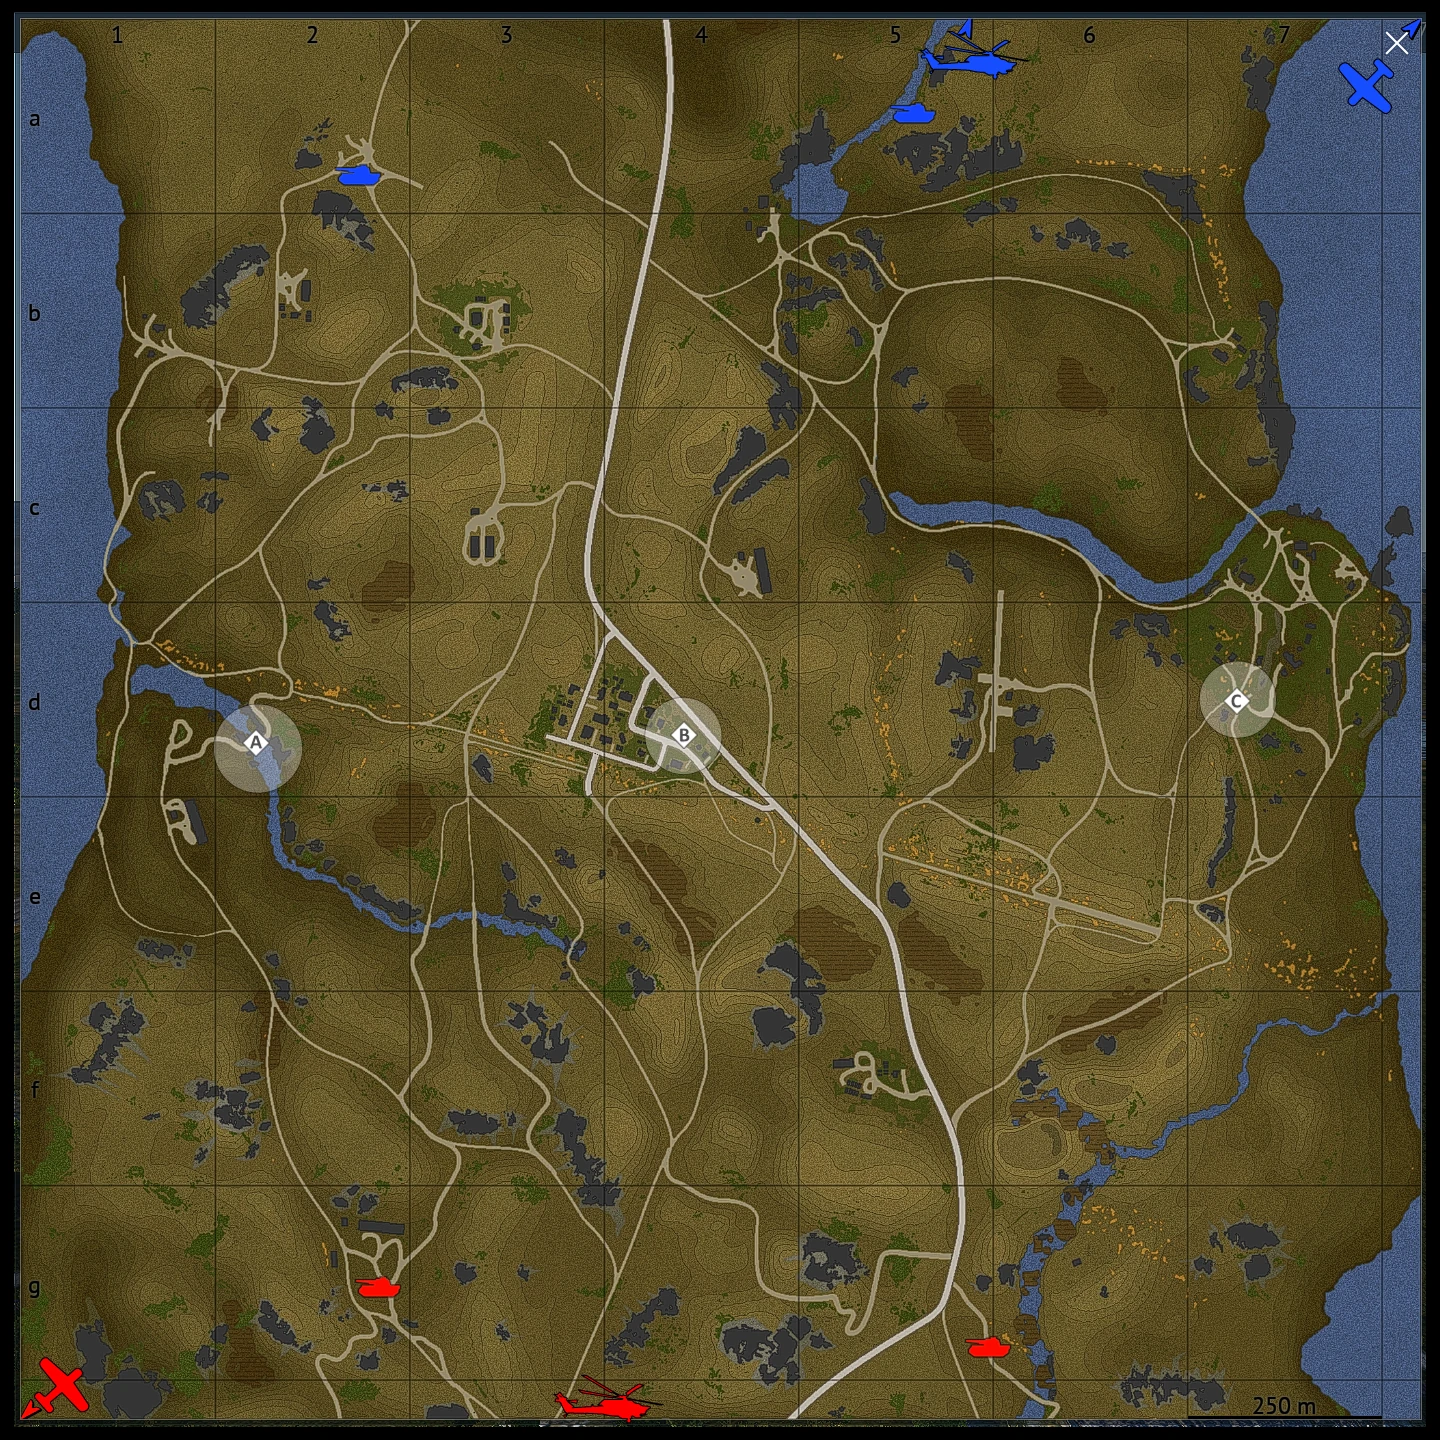 Click to enlarge
Tactical Summary
Darwin Hill has a strongly asymmetrical opening around its capture points. Point A is very easy for the southern team to reach and secure, while point B is very easy for the northern team to capture early.
Because of this, the opening usually develops with each side naturally controlling one favorable objective rather than both teams contesting the same point on equal terms.
The important part is what happens after those initial captures. Instead of overcommitting to the enemy-favored point, it is usually more effective to stabilize your own objective first and then look for a breakthrough or flank that can shift control of the rest of the map.
Map editing tools
Drag icons from the legend onto the map.
Comment
0 / 120 B
0 / 120 B